Start: Monday, March 30, 2020 Due: Friday, April 3, 2020. Email writeup to Prof RC, and post an image of your design sketch to the FB Constructors Group
Dedicated robot constructors chafe in quarantine. We will not be building Urchin-bot (the mockup for which, if you recall it, now reminds me of pictures circulating of the corona virus) But we will build something. As mortals sleep, component kits are being assembled by busy minions. Through the miracle of modern mail, a box of random robot parts should magically appear on your doorstep by week's end.
Not quite random, actually. The parts are selected to allow you to construct your very own "Home-bot"! The basic idea employs a classic 2-wheel drive architecture. What Roomba and a million other bots you can buy on the web use. But you are going to build it from scratch and create your own unique design, With points for creativity, artistry, and craftmanship.
The mechanical heart of Home-bot is a pair of Hitec HSR-2648CR continuous rotation servos with attached 3.1 inch diameter x 3/4 inch wide wheels. These servos can rotate at up to about 60 rpm, which would produce about 9 inches per second with the specified wheels. Not too fast, but not so slow either (and if someone were to engineer larger wheels, higher speeds might be possible)
Your job, in this lab, is to design a matboard chassis for your Home-bot, and generate an accurate, (engineering design) drawing depicting it and all its dimensions.
The chassis, whatever form it ultimately takes, must function as a frame to hold the servos. Standard RC servos are designed to drop into a rectangular slot, where they are secured by screws. That is probably the best approach to take here. To this end, the kits contain #6 by 3/8 self-tapping screws which will work, (with some tricks I'll discuss later) to attach the servos to matboard) They WILL NOT work in foam-core or corrugated cardboard, which is why it is important to get the right material.
The chassis also ultimately supports all the other robot components (battery, bread-board/circuit-board, Arduino, sensors, teeth, tusks, fins, wings, arms, claws, EMP devices, etc., so it needs to have sufficient space, strength, and rigidity for this purpose. Decent engineering design is thus essential. Strategically placed braces, struts, flanges, and face frames can all increase strength and rigidity without adding a lot of extra weight. The matboard material can also be laminated with white glue to form double-thickness components if extra strength is needed in particular locations.
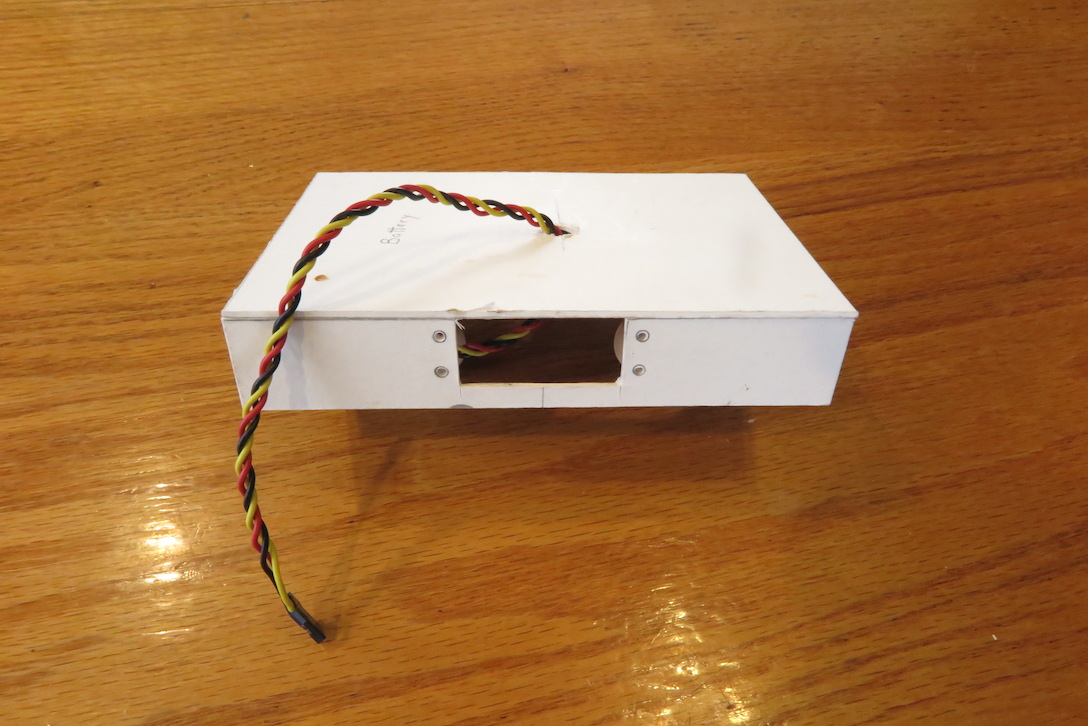
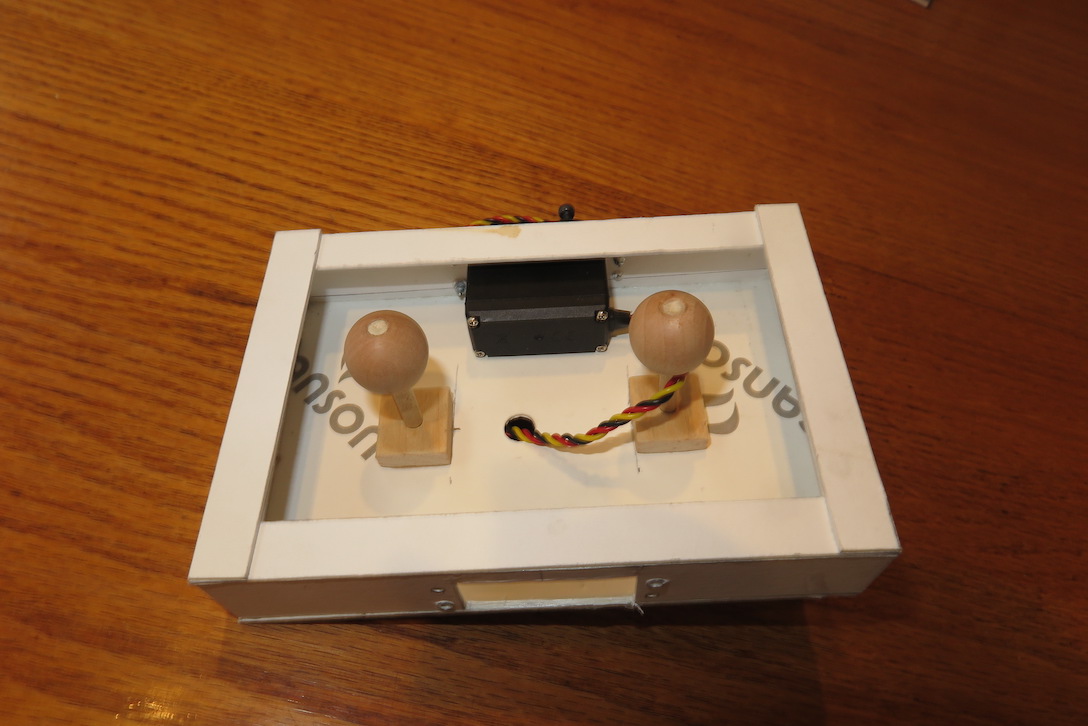
The pictures below provide an example of an absolute minimalist chassis - basically a simple box. I do not encourage you to duplicate this - exercise your creativity, but inside whatever you create, there must be structure to hold the servos in an equivalent geometry.
Be exact and precise in your design drawings. I encourage the use of scale projections and rulers. (Or you can use a computer drawing/design tool if that suits you). The material is 1/20 to 1/16 inches thick, and you need to take account of this. You should also show the details of what edge glues to what surface at corners. Basically you should be able to had your drawing to someone else and they could build it.
Expect to modify your design as the construction proceeds. You will probably rebuild it a couple of times from the beginning - stuff will up that you didn't think of. That is the nature of any design process, and is why there are always multiple prototypes and mockups. For this reason, it is important that you attach your (not easily replaceable) central components (servos, Arduino, breadboard, battery) in ways that allow them to be removed easily and without damage.
DON'T build this. It's an absolutely minimalist skeleton example. I expect more artistry, creativity, and flamboyance in your personal bot. And don't feel limited by what is in the kit. It's a minimum. You are free to use any other BASIC components (not whole robots off the internet or chunks thereof) that you can make, find, or acquire.
Basic box for holding servo units. The overall size is about 4" x 6" x 1".
Note the screw holes for attaching the servo
(made with ice-pick and hardened with a drop of superglue).

Bottom view of basic chassis box. Note the face frame. This increases rigidity by an order
of magnitude (you will discover that an open box has a racking instability).
The two wooden balls are balance elements. They slide along the ground as the bot moves.
Some designs only have one of these. Bigger bots often use a swivel caster.
I'll send wooden balls with the kit, but feel free to experiment with
anything else you can find.
I used wooden dowels in this prototype so I could experiment with different heights,
but the balls could be attached to a square or pyramidal support made of matboard.

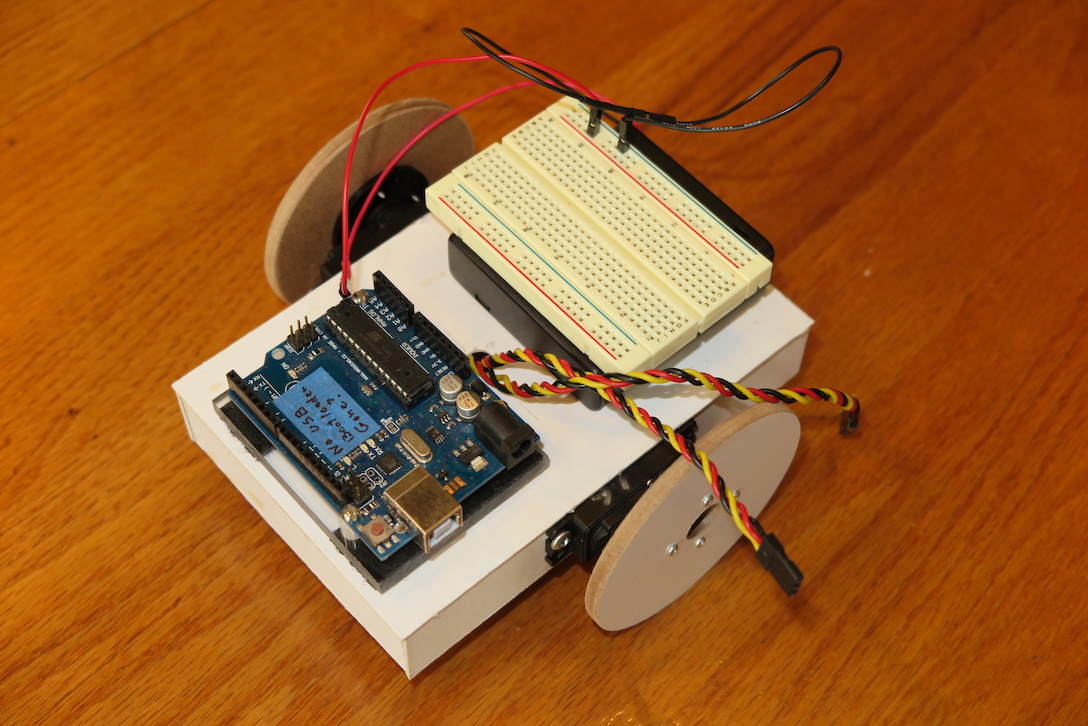
Mockup 1 with fake wheels, stand-in (right size, wrong type) servos, and other components stacked up to
see how they fit.

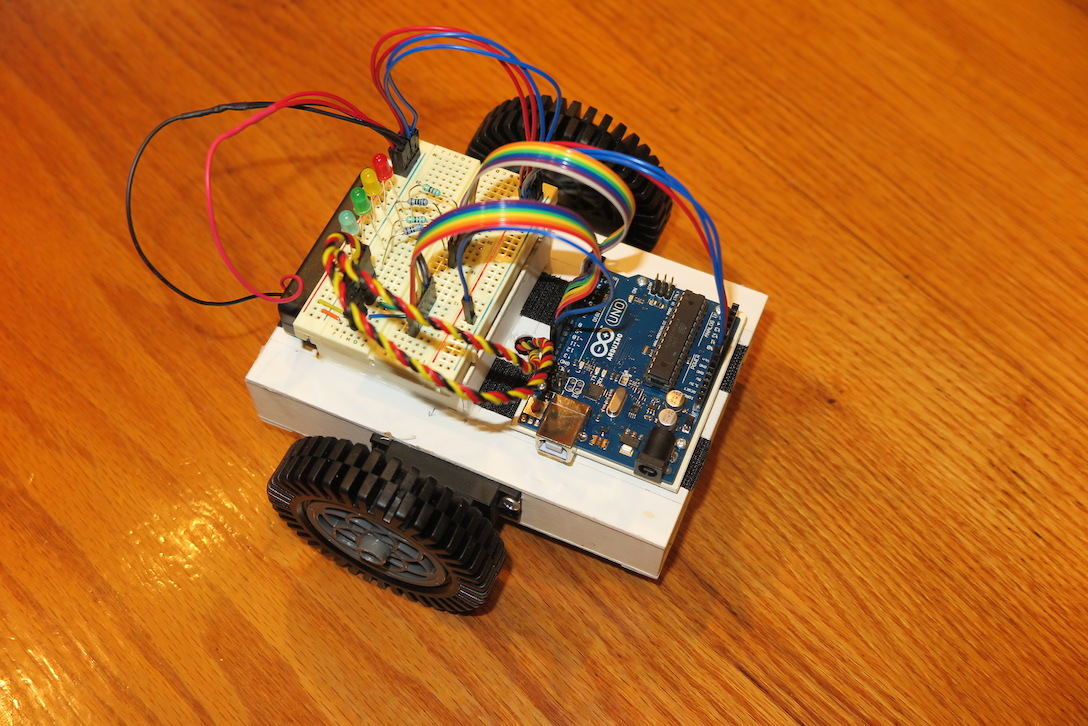
Mockup 2 with box for battery (so it can be removed without disturbing other components),
correct servos, real wheels, velcro tape for holding Arduino and breadboard, and some
prototype wiring.

Approximate dimensions of large components
Matboard material reminder. Material must be at least .050" (1/20)" thick. This is an art/craft product used for mounting pictures. It is NOT the material called "foamcore" (also used in mounting pictures). You can get it at art and craft stores, framing places, or online. For example this great Rochester resource. Or this cheaper place (caution, I have not used this supplier) Golden State Art. Two or three 16" x 20" pieces, four or five 11" x 14" pieces, or one large sheet should be plenty.